Engine test
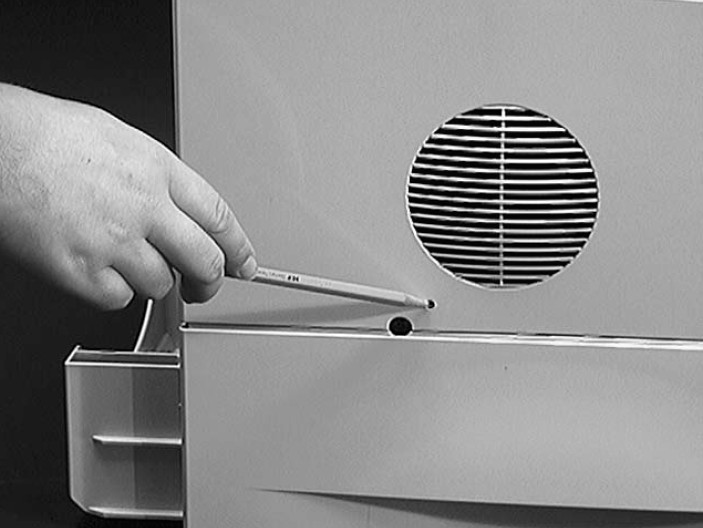
The printer has a built-in test pattern (pairs of vertical lines). The test print can be made by pressing
the test print switch located on the left side of the printer (see figure 93 on page 190) once—after the
photosensitive drum has stopped and the printer has entered the standby mode. If the switch is held
down, the test pattern is printed continuously. The switch can be used when paper is loaded in any
tray other than tray 1.
The engine test:
Test Verifies if the print engine is functioning correctly (the formatter is completely bypassed during an
engine test)
Test Is used for isolating printer problems
Test Is used for checking and adjusting registration
Test Prints from tray 2, 3, or 4 only, not from tray 1
Test Can be activated with the formatter removed
Note: For the printer to perform an engine test, tray 2, 3, or 4 must be installed and loaded with paper, and the toner cartridge must be installed in the printer.
Location of engine test button:
The engine test button is located on the left side of the printer, below the fan vent.


